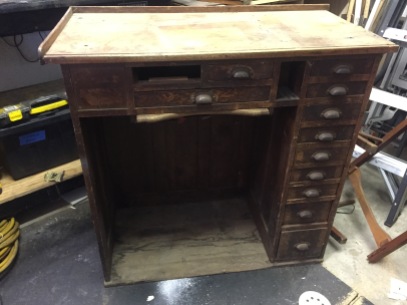
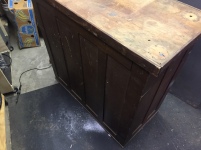
Following a remodel of our living room in early 2017 (I guess I should have done a blog about that first), I was looking for the perfect piece of functional furniture to sit in a certain corner. Though we were going for a more modern look in the room, I still insisted that we include at least one piece (okay, four pieces) of rustic Americana.
Then I remembered what I had in the barn. In late 2016 I found myself at a yard sale in central Ohio facing the conundrum of whether or not to buy a decently priced Rosberg Jewelers/Watchmakers Desk. There was a reason it was “decently priced”: this thing was most assuredly in rough shape: It creaked and popped whenever moved and it was obvious a complete tear down would be needed. Besides, at the time, I had no idea where I’d put it. Whelp – buy first and figure that problem out later, that’s what I always say.
Upon getting it home, I immediately tore into the project with excitement, taking care to keep the parts organized, take photos of pieces as they came off and mark what pieces went where. As I took the pieces off one by one, it slowly became obvious the enormity of the project, but I pressed on. The only things I never disassembled were the drawers – as it turned out, they were all still pretty sturdy and tight.
You’ll never hear me claim to be any kind of expert furniture builder but I feel comfortable in saying this was no grand feat of engineering in the way this desk was originally put together: butt joints as far as the eye could see. I guess this was just the cheap furniture of the day, feel free to leave comments correcting me on that.
With the desk fully disassembled I fully sanded every piece up to 120 and began the large task of re-gluing all the individual sides back together in preparation for reassembly. As evidenced in the pictures, I nearly used every clamp I have trying to do multiple sides at a time while also trying to rebuild the desk and ensure it was square. As I pointed out to my wife, all those bar clamps that spend most of their life hanging on the wall were put to use. The trickiest part was putting the drawer separators back in – each one had to be put back in the original spot and leveled before being clamped. After quite a bit of patience I was able to get them all balanced and squeezed up.
I found it interesting that the desk is mostly oak with the exception of the top, I believe this is maple. This seems to be somewhat common in others I see online – I wonder if this is because the maple is smoother and/or lighter-colored – maybe it’s easier to keep track of small parts on?

When the desk was fully reassembled I put it to the side. Colder temperatures in the shop made for an easy excuse to not get into final sanding and finishing. The desk sat (in the way) until nearly spring when I finally eyed the perfect spot for it. I final-sanded the entire base up to 150 and the top to 240. I didn’t want to go ultra-smooth on the base as I wanted the desk to retain it’s rugged, well-used look and feel. Because of that, I also did not sand any piece to perfection and you can see the final top still has plenty of stains and blemishes on it. The drawer pulls were left alone as well to retain their used look and feel. The only piece that was remade was the blank/cover piece on the top left of the desk face – the original for whatever reason was poplar so at least oak looks like it belongs. I made a new fabric piece for the lap tray out of some spare duck cloth canvas I had from a previous project.
After three layers of polyurethane (steel wooling in between), I moved the desk, much to my wife’s chagrin into our new living room. I still use it as a workspace today. Thanks for reading!


